Journey into IoT Cloud With NodeMCU & Heroku - Part 1 Choose your tools wisely!
I have been tinkering with electronics for a while and with all the noise around IoT, Cloud & Salesforce it was time to try connecting my own Internet Thingy to Cloud. Since this is a topic rich in details I decided to make this blog in parts. This is Part 1, selecting tools, kits and parts. First step is selection of IoT tools and kits to start with. There are many kits available but I set some common sense parameters of what to build and what it may look like:
- Small form factor in size
- Minimal power consumption that can run on solar or small battery and be selfsufficient.
- Easy to develop with, Arduino IDE, Sketch or similar tools & language.
- Standard well known parts
- WiFi connectivity and USB
- Something that will work with known cloud platforms such as Heroku, Salesforce or AWS.
I started by reviewing several kits. Typical IoT kit costs range $45 - $200 that variation depends on number of parts & sensors you get. Starter kits include main connection component and some sensor devices. Some are plugable units, others work on breadboards or need soldering on prototype board. Here are some examples:
Little Bits - is a kit that Salesforce gave out at the Dreamforce conference to some MVPs as IoT gifts. Looking at first glance it was very cool and simple to develop. Plug and play bits, no soldering needed. There is a Salesforce littlebits-connector package on github that aims at building IoT declaratively with Salesforce. All good but reading in details that actual LittleBit connection module that makes it all work is an embedded Linux box on a chip, impressive but, it also has large power consumption and heat generation, it requires plug into the wall to work. Good for testing ideas but limiting in actual applications.
Intel® Edison Board and Grove - AWS IoT kit interesting as number of other kits focused on connectivity to Amazon Web Services IoT Cloud platform. Yet again seem large size and power, good for prototyping and building home kits etc.
I also looked at several cloud based platforms that simulate your IoT devices and help to quickly prototype ideas. This is a growing trend in IoT market and rightfully so since that is where value and ROI in IoT is predicted to grow for the long run. Everyone knows that you cannot profit big with selling physical devices at low cost. These platforms aim at being data collectors and aggregators for IoT connectivity and data analytics. That seem a bit of cheating because for some of them you not really working with real devices but with simulated thing. Some of them I list here:
- Xively - Heroku Salesforce partner IoT platform has well documented instructional demo to try a POC with Heroku or Salesforce. Mainly Enterprise connectivity and data collection platform for IoT sensors that is very sleek! But it leaves that hard work of actually connecting your sensors to 3rd party developers or sensor manufacturers. Smart move on their part to stay away from learning millions of device drivers. Remains to be seen how practical that really is being virtual and that removed from actual device code and relying on some programmer to do the hard work of using Xively SDK API to connect devices.
- Particle - is very nice full featured IoT Cloud platform that also has its own sleek Particle Photon device kits (this be #2 choice).
- AWS IoT - Mature Cloud platform build with familiar AWS services model to connect your devices and have number of kits & devices supporting IoT SDK.
- Google IoT Platform - well it is Google!
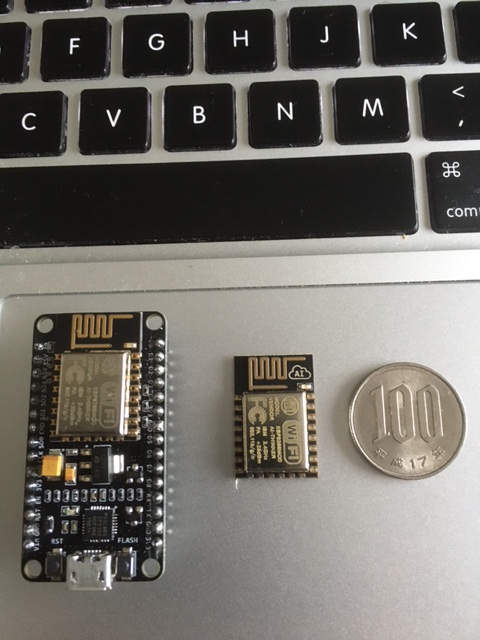
After some quick reads I found info about low cost IoT WiFi unit based on ESP8266, that peaked my interest, basically internet router on a tiny chip board that runs on 3V of power and low cost. I did some more research and found Open Source project based on this unit NodeMCU ESP2866, bingo just what I was looking for, small, low power consumption, open source (bonus) and low cost to build.
Next step finding actual device kit that based on NodeMCU ESP8266. NodeMCU development is done via Arduino IDE and can use programming languages like Sketch or Lua. It is like loading firmware on the chip, a small program. To load programs to NodeMCU we use USB connection with IDE or LuaLoader.
I had to check what was compatible devices and chipsets that will work with Mac OSX and most other computers. I knew about number of IoT devices use low cost chips that do not have signed USB drivers, that can be difficult to connect with. Although possible to hack that with changes to Mac OSX security and finding alternate driver. I wanted to avoid that. If you do have a kit that needs these unsigned drivers here is some useful info CH340x instructions how to make that work on Mac OSX El Capitan.
After quick search I have selected a NodeMCU ESP8266 IoT kit from OddWires that had 2 NodeMCU units one complete developer kit v1.0 with mini USB connector, another unit is just ESP8266 that can be used on proto-board to build your own NodeMCU design.
Important consideration was USB connector module in this kit it is based on CP2102 USB UART chip that has a good signed drivers for Mac OSX, Linux or Windows available from Silicon Labs CP210x USB to UART Bridge VCP Drivers. This kit also has several sensors and set of wires, breadboard, and other parts, see full details for what is included in this kit.

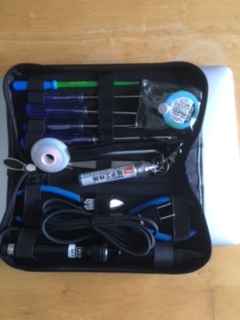
We have the kit/parts next will need some tools to assemble our project. You have a full array of tools to choose from and everyone has their favorites, personal choices. I can share a toolkit I use is Engineer KS-03 professional instruments, in small portable zip-case you can take it with you on the road. It is a sort of a traveling IoT Lab.
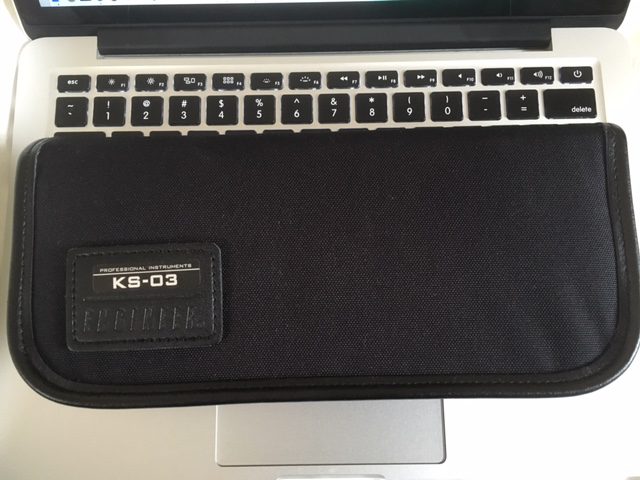
This toolkit cost approximate 5000JPY - $50 in Akihabara Electric town in Tokyo Japan loaded with Electronic shops and other interesting things. It is small light tool set that has mostly everything you need to build your IoT project or electronic components. It even includes mini soldering iron.
At this point we have everything ready to build our Internet of Things device. In the next post will explore how to set up and connect NodeMCU with Mac and work on Arduino IDE, Part 2 - Connecting NodeMCU with IDE tools for development.